Getting started with n8n AI automations
Getting started with n8n AI automations
Short intro to n8n
n8n is an open source and no-code automation tool that gives you flexibility to use AI agents in your workflows. You can self host it on any VPS provider or may use their cloud version which comes at a cost.
Idea
I'm exploring n8n and measuring its capabilities and I'll keep updating my digital garden as I explore this new tool. This article deals with installing and running n8n.
Installation steps
Install Ollama
I do not want to use OpenAI's keys for installation purposes (and further) as they are costly and why running a mammoth if ant can do the job. I will be running my first workflow on deepseek-r1 8B.
The easiest way to install this and many other models locally is using Ollama.
You can install Ollama depending on the version of OS you are using from this link.
After installing Ollama, open it's chat interface. Here you will be presented with the model you want to use.
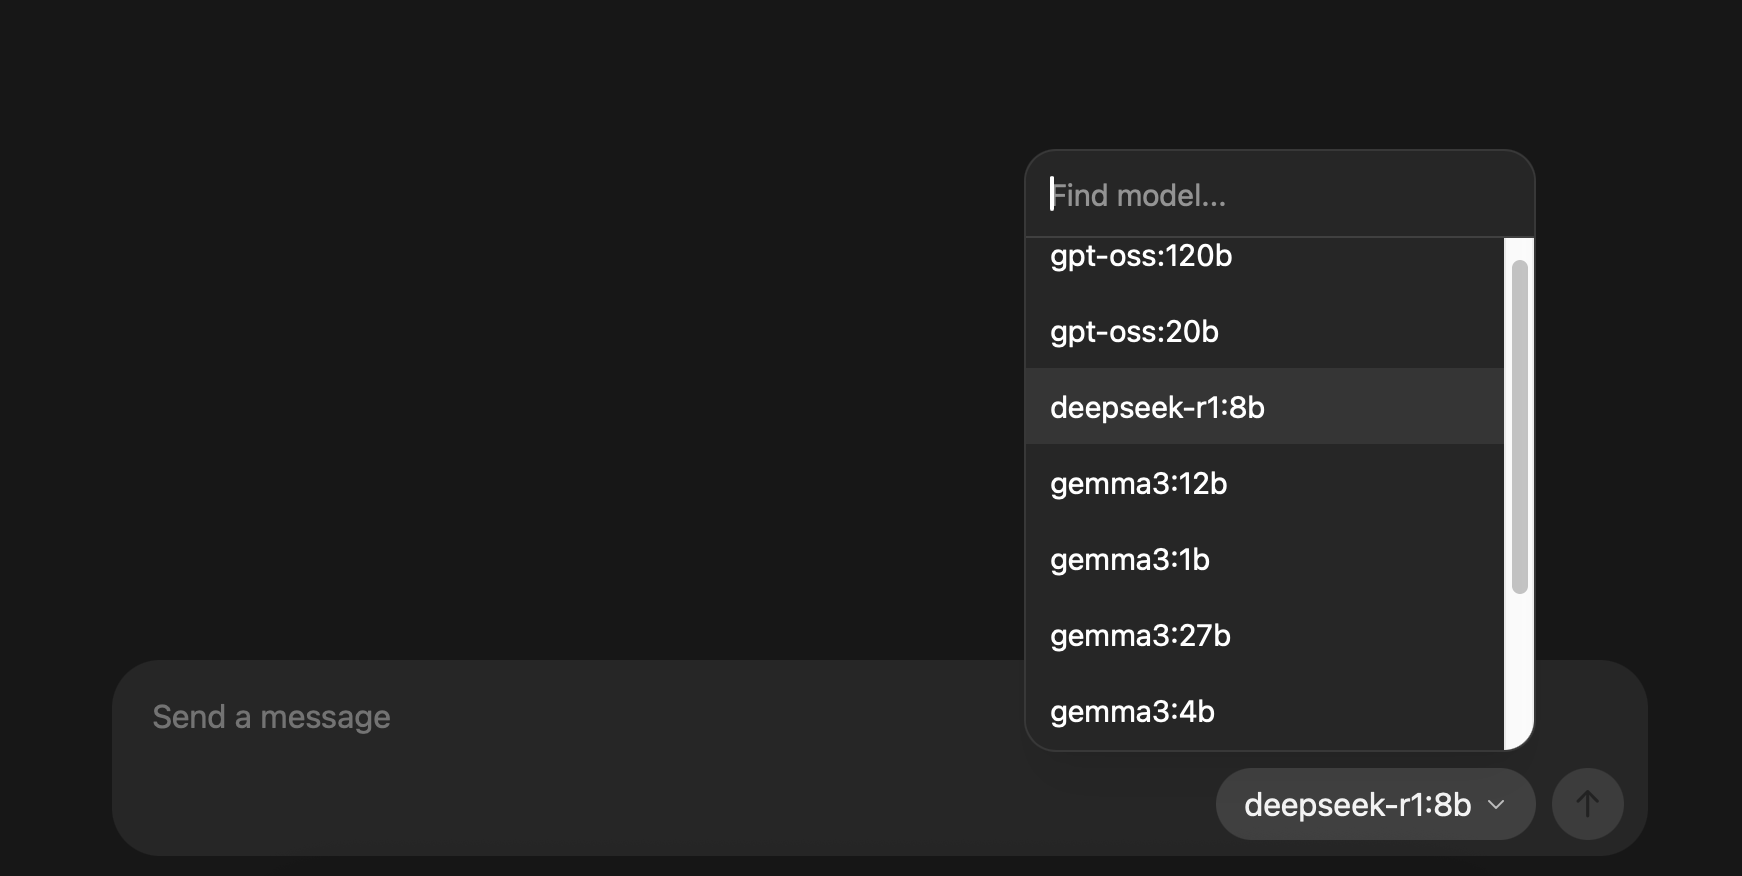
Choose any one you want to explore, I'll be choosing deepseek-r1:8b. There are no preferences for choosing this model.
I choose it because my intuition said to choose it.
Once you write hi in its interface, it will start downloading the model. Wait for the download to finish.
Once finished, you will need to start Ollama as a server which you can do from terminal by running the below command.
❯ ollama serve
time=2025-08-23T15:09:35.693+05:30 level=INFO source=routes.go:1318 msg="server config" env="map[HTTPS_PROXY: HTTP_PROXY: NO_PROXY: OLLAMA_CONTEXT_LENGTH:4096 OLLAMA_DEBUG:INFO OLLAMA_FLASH_ATTENTION:false OLLAMA_GPU_OVERHEAD:0 OLLAMA_HOST:http://127.0.0.1:11434 OLLAMA_KEEP_ALIVE:5m0s OLLAMA_KV_CACHE_TYPE: OLLAMA_LLM_LIBRARY: OLLAMA_LOAD_TIMEOUT:5m0s OLLAMA_MAX_LOADED_MODELS:0 OLLAMA_MAX_QUEUE:512 OLLAMA_MODELS:/Users/shubham.kumar/.ollama/models OLLAMA_MULTIUSER_CACHE:false OLLAMA_NEW_ENGINE:false OLLAMA_NEW_ESTIMATES:false OLLAMA_NOHISTORY:false OLLAMA_NOPRUNE:false OLLAMA_NUM_PARALLEL:1 OLLAMA_ORIGINS:[http://localhost https://localhost http://localhost:* https://localhost:* http://127.0.0.1 https://127.0.0.1 http://127.0.0.1:* https://127.0.0.1:* http://0.0.0.0 https://0.0.0.0 http://0.0.0.0:* https://0.0.0.0:* app://* file://* tauri://* vscode-webview://* vscode-file://*] OLLAMA_SCHED_SPREAD:false http_proxy: https_proxy: no_proxy:]"
time=2025-08-23T15:09:35.695+05:30 level=INFO source=images.go:477 msg="total blobs: 5"
time=2025-08-23T15:09:35.695+05:30 level=INFO source=images.go:484 msg="total unused blobs removed: 0"
time=2025-08-23T15:09:35.695+05:30 level=INFO source=routes.go:1371 msg="Listening on 127.0.0.1:11434 (version 0.11.6)"
time=2025-08-23T15:09:35.728+05:30 level=INFO source=types.go:130 msg="inference compute" id=0 library=metal variant="" compute="" driver=0.0 name="" total="10.7 GiB" available="10.7 GiB"
This is it for Ollama installation, next install n8n.
Install n8n
The easiest way to run n8n locally is using docker and docker compose.
The simplest docker compose config is as follows.
Create a docker-compose.yml file and paste the below code.
version: '3.8'

volumes:
  n8n_storage:

services:
  n8n:
    image: docker.n8n.io/n8nio/n8n
    restart: always
    ports:
      - 5678:5678
    volumes:
      - n8n_storage:/home/node/.n8n
Now run, docker compose up -d and n8n will start locally on port 5678.
The initial screen will ask you for your email and other details which you will need to fill to get started.
That was all. Installation completed.
Create a small workflow connecting Ollama
On opening n8n you will be presented with an empty workflow tab.
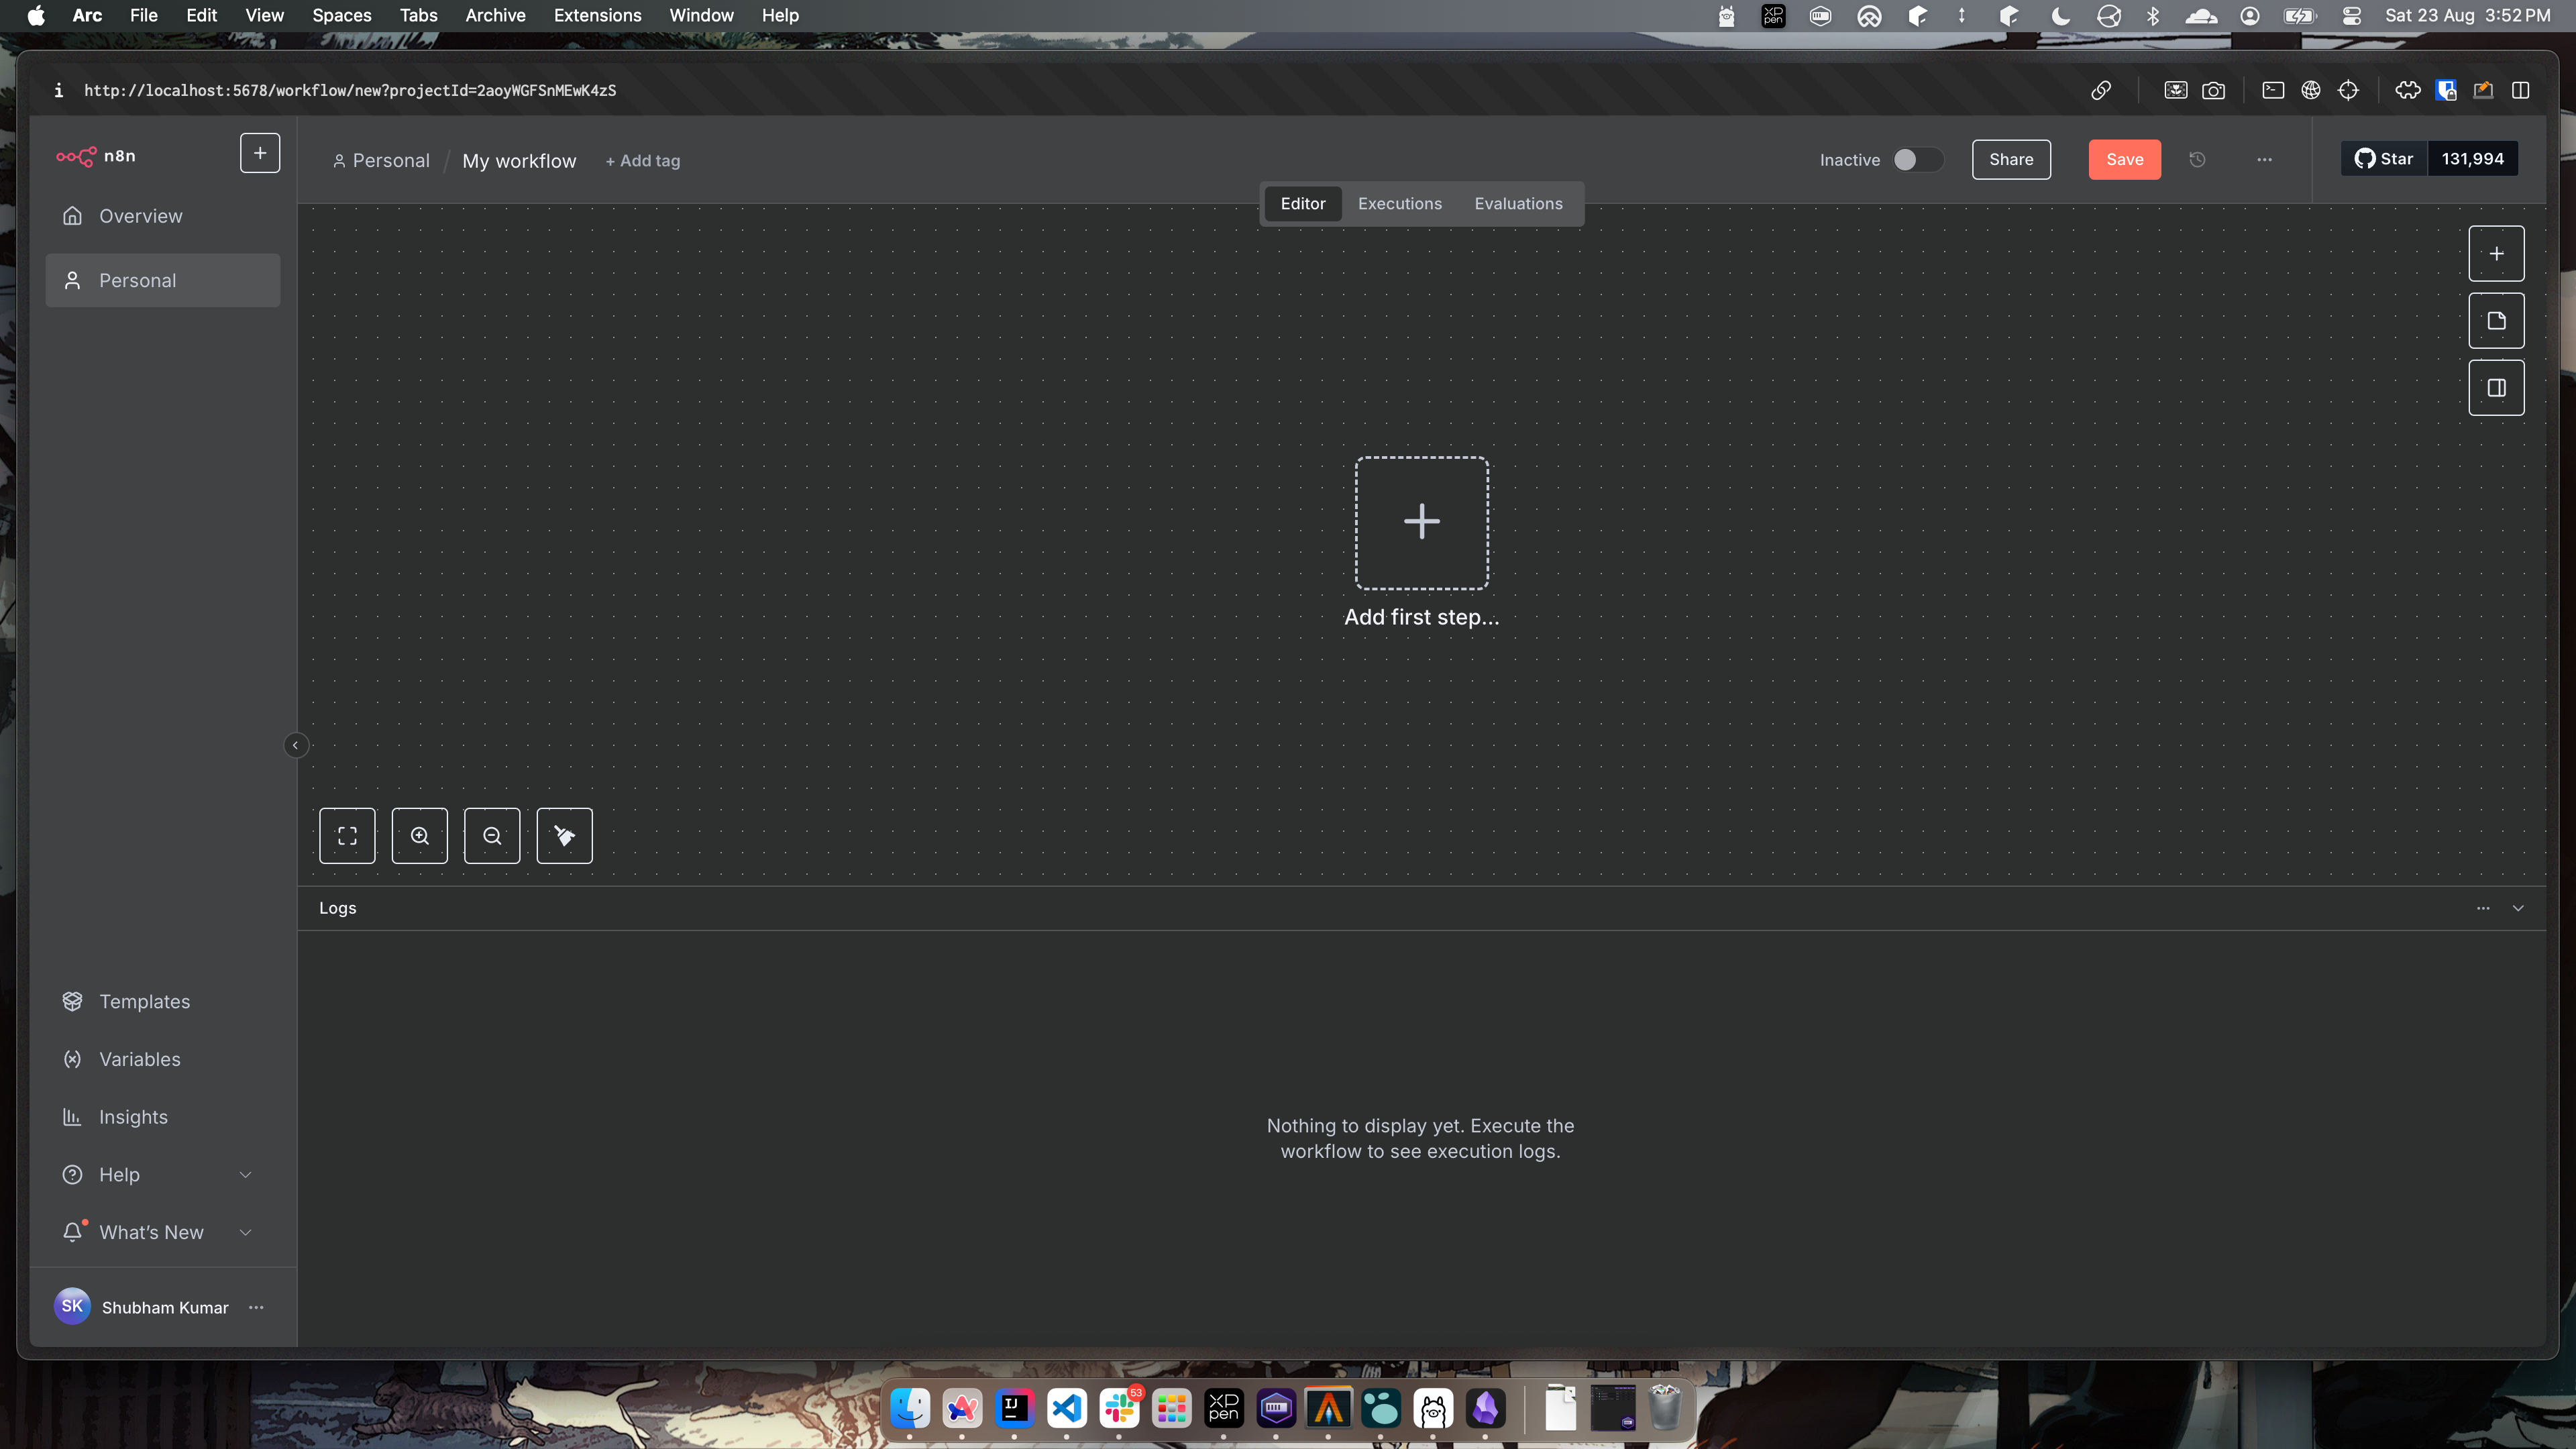
You can create a simple AI workflow as follow.
- Click on
Add first step...and selectOn chat message. - No need to change any config in the opened tab. Just click back to canvas on top left.
Now your workflow will show the chat action. You can enter any text in the chat area and see the message output here.
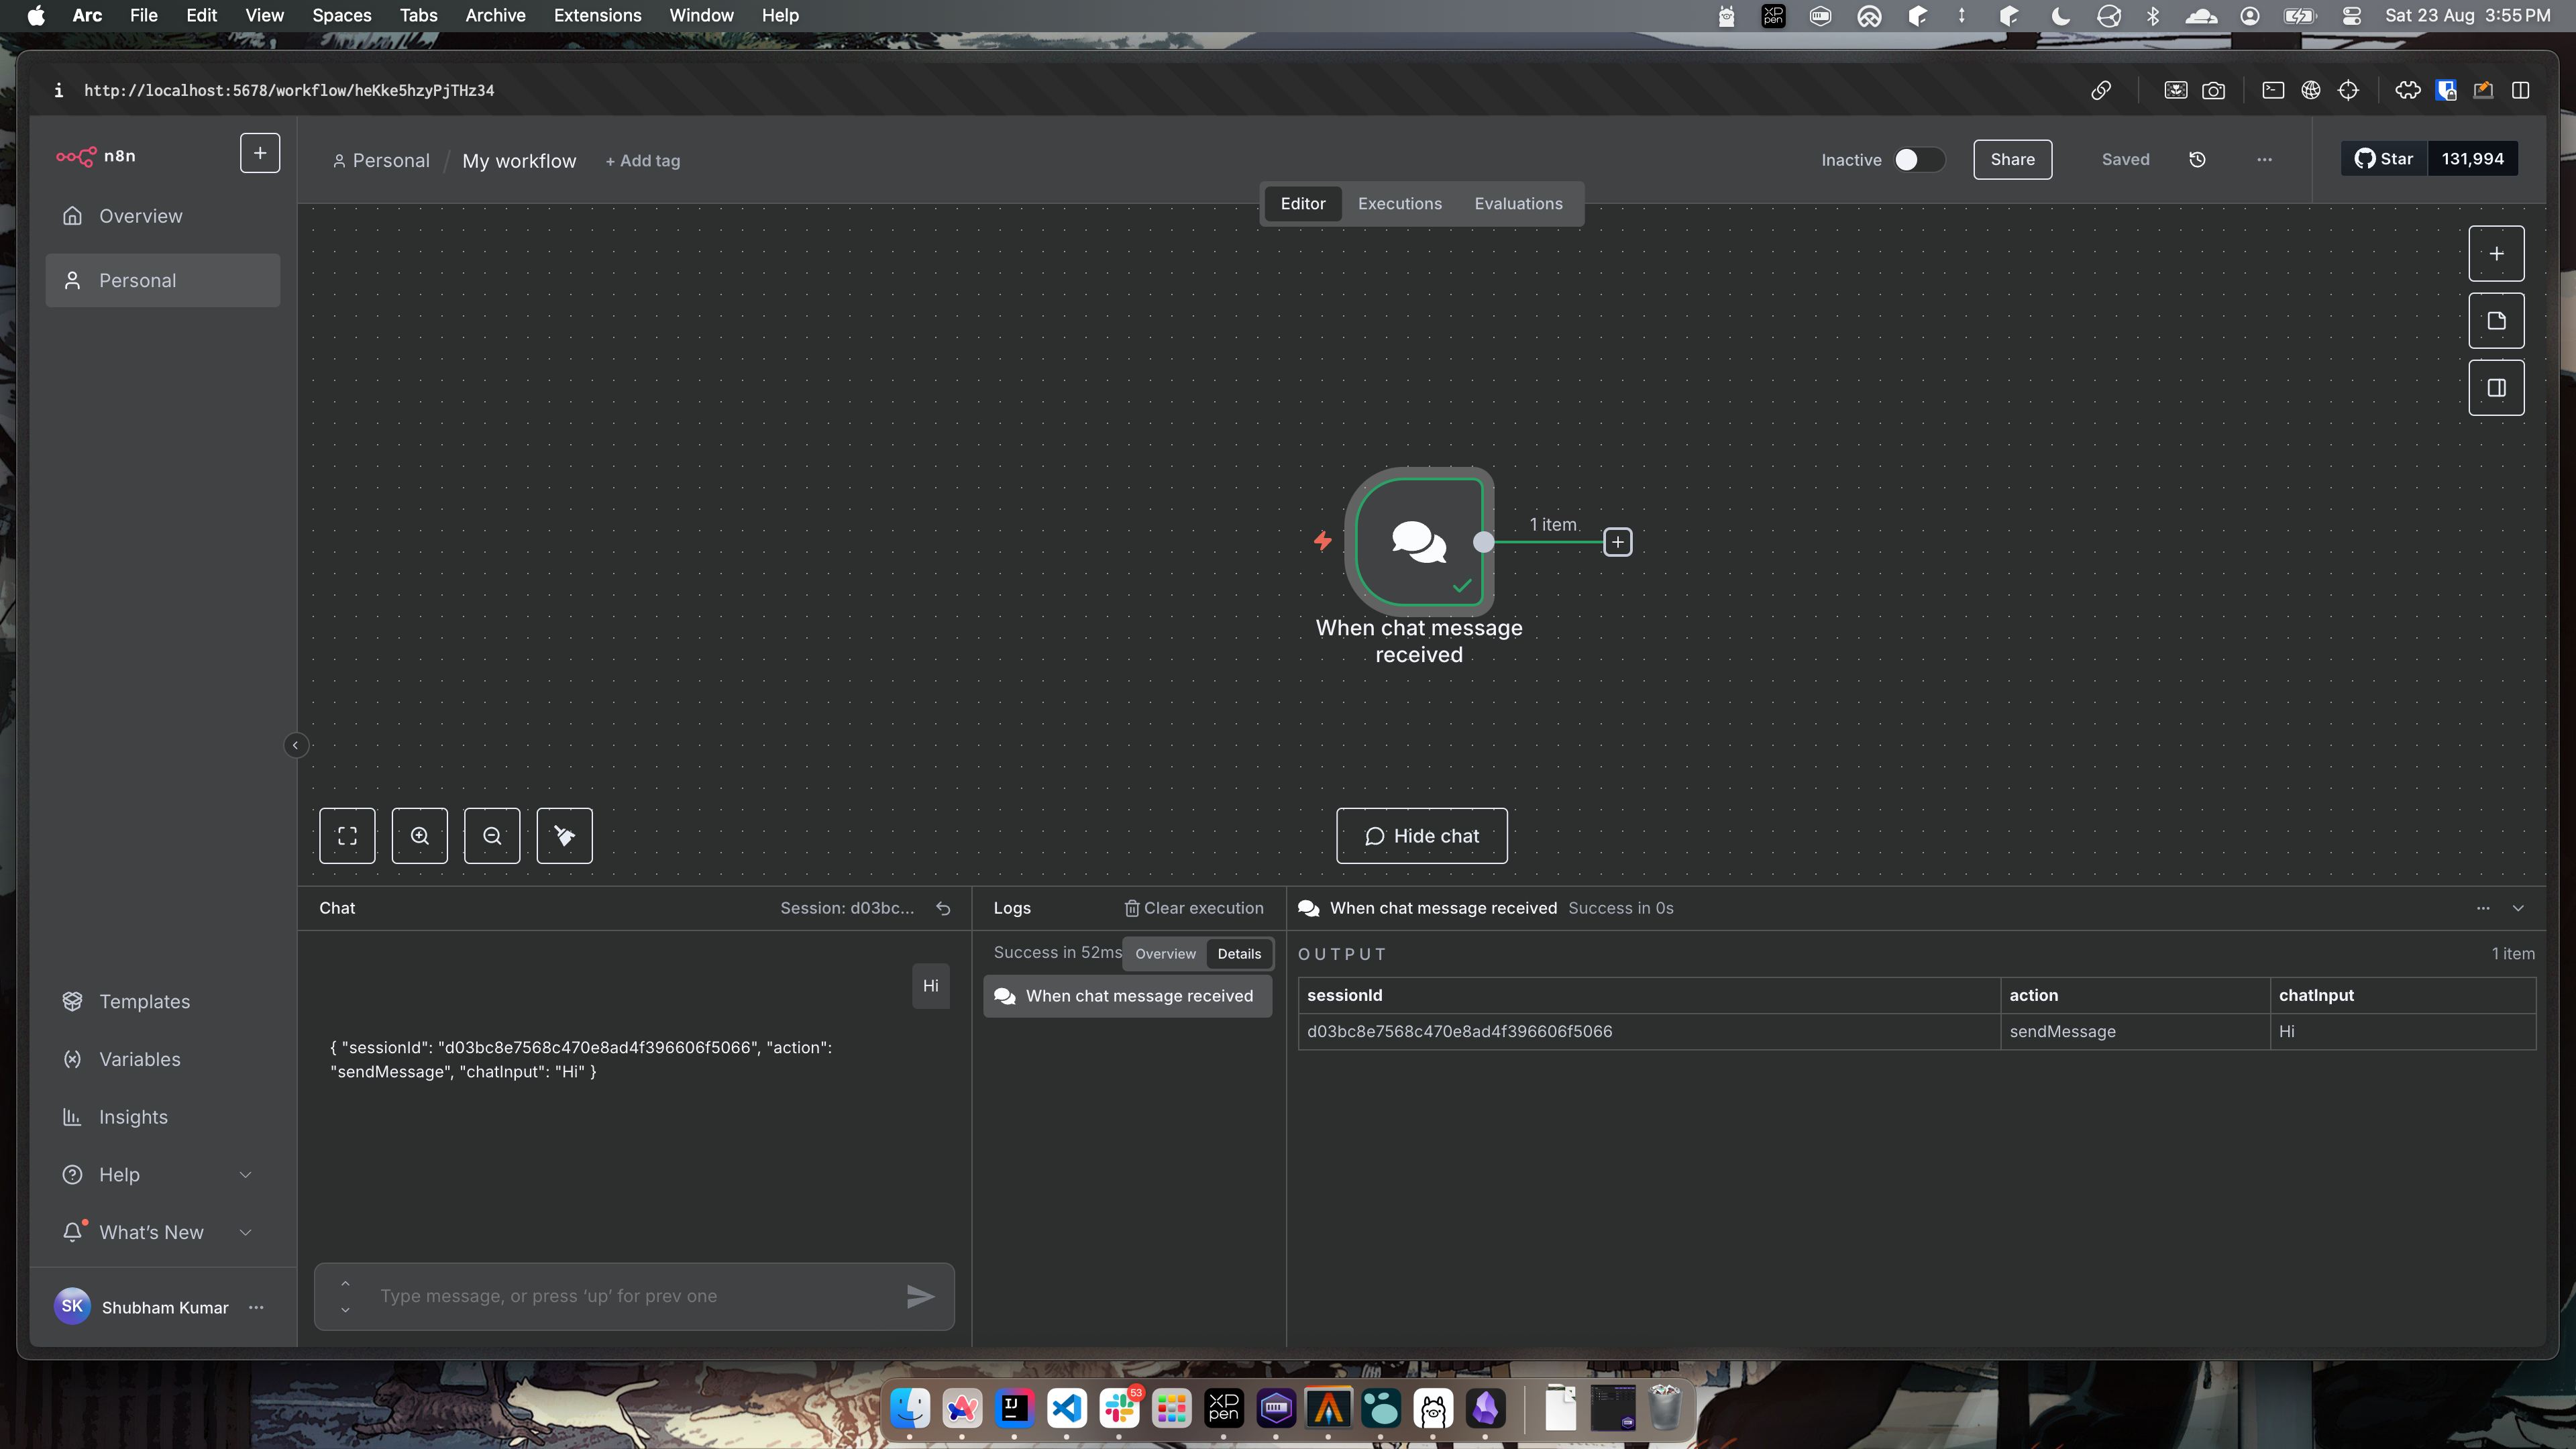
- Next, click on the plus icon and add
AI Agent, again no need to change anything.
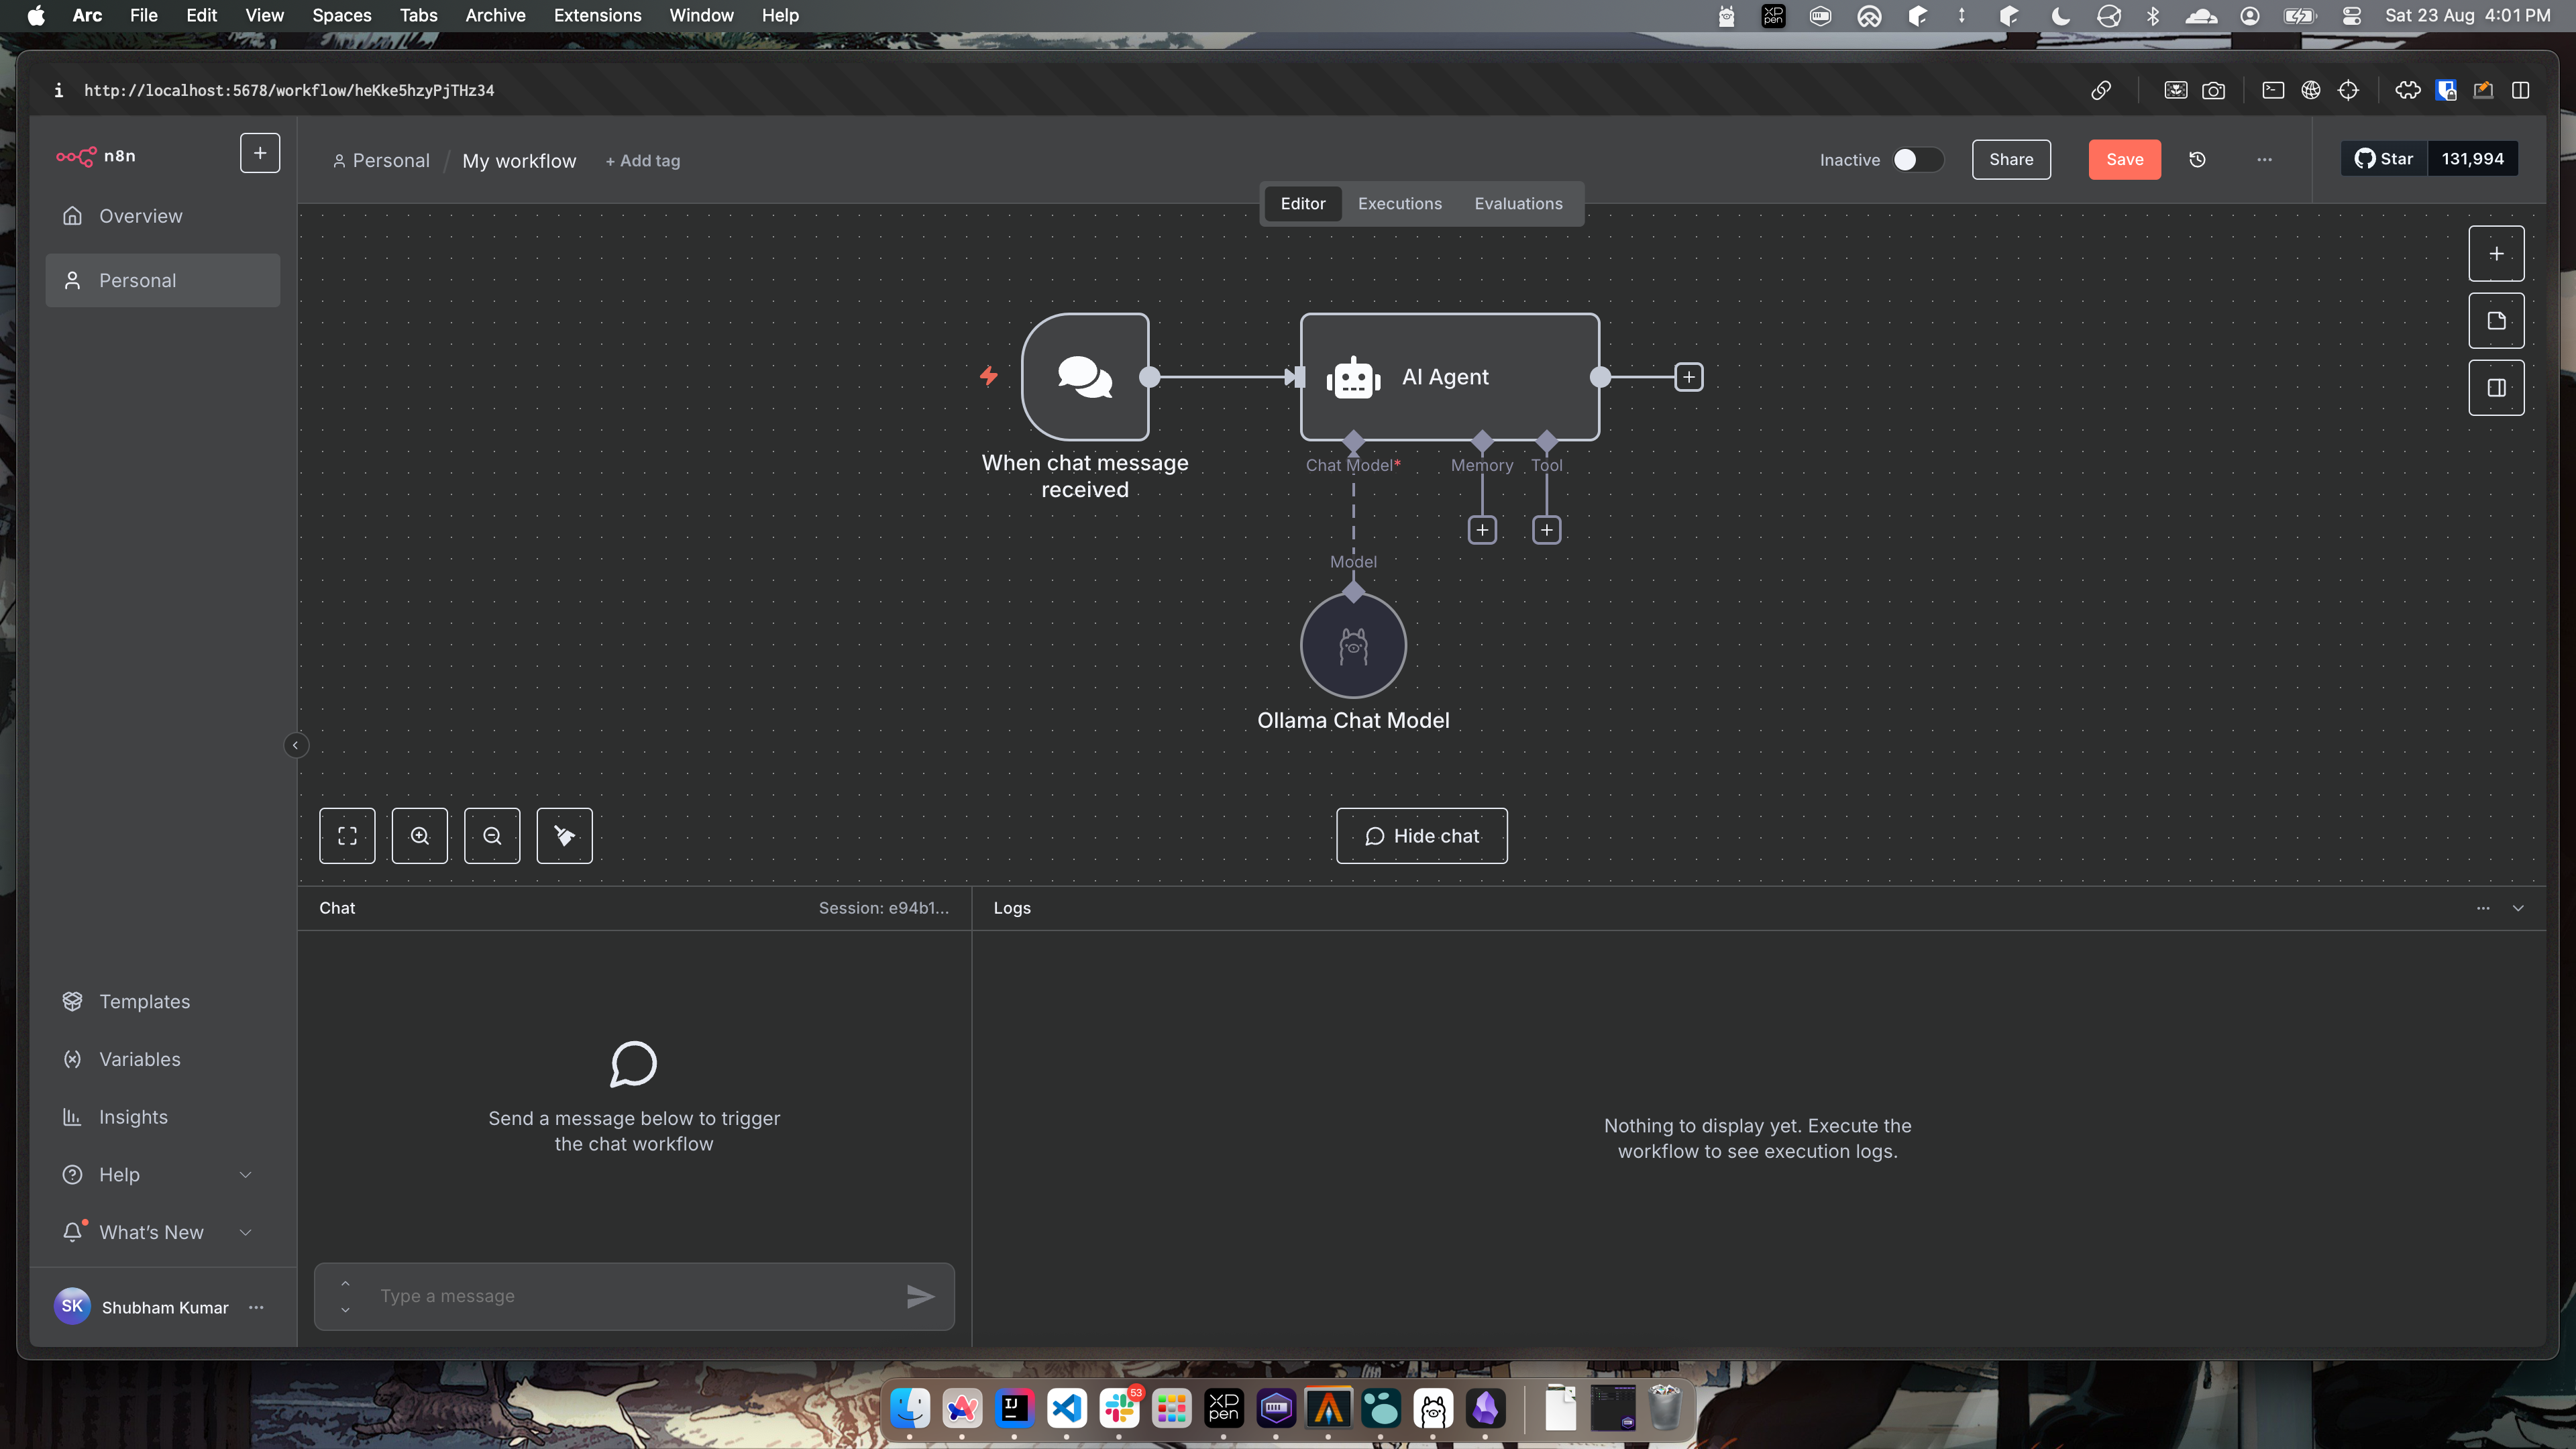
Now your workflow will look something like this.

- Next we will add chat model, click on the plus icon pointing to chat model. Here, you will select
Ollama Chat Model.
Here you will need to provide the name of the model that you will be using. We will usedeepseek-r1:8b
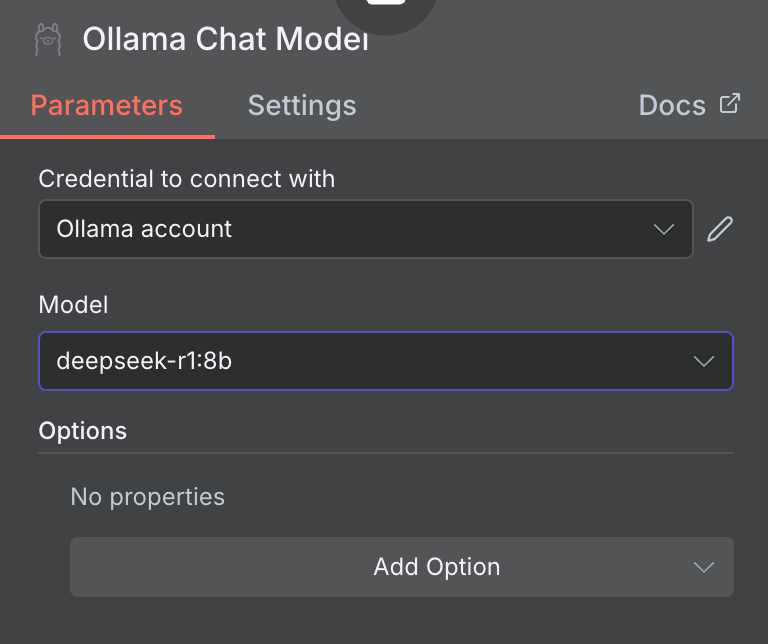
Now, your workflow will start looking something like this.
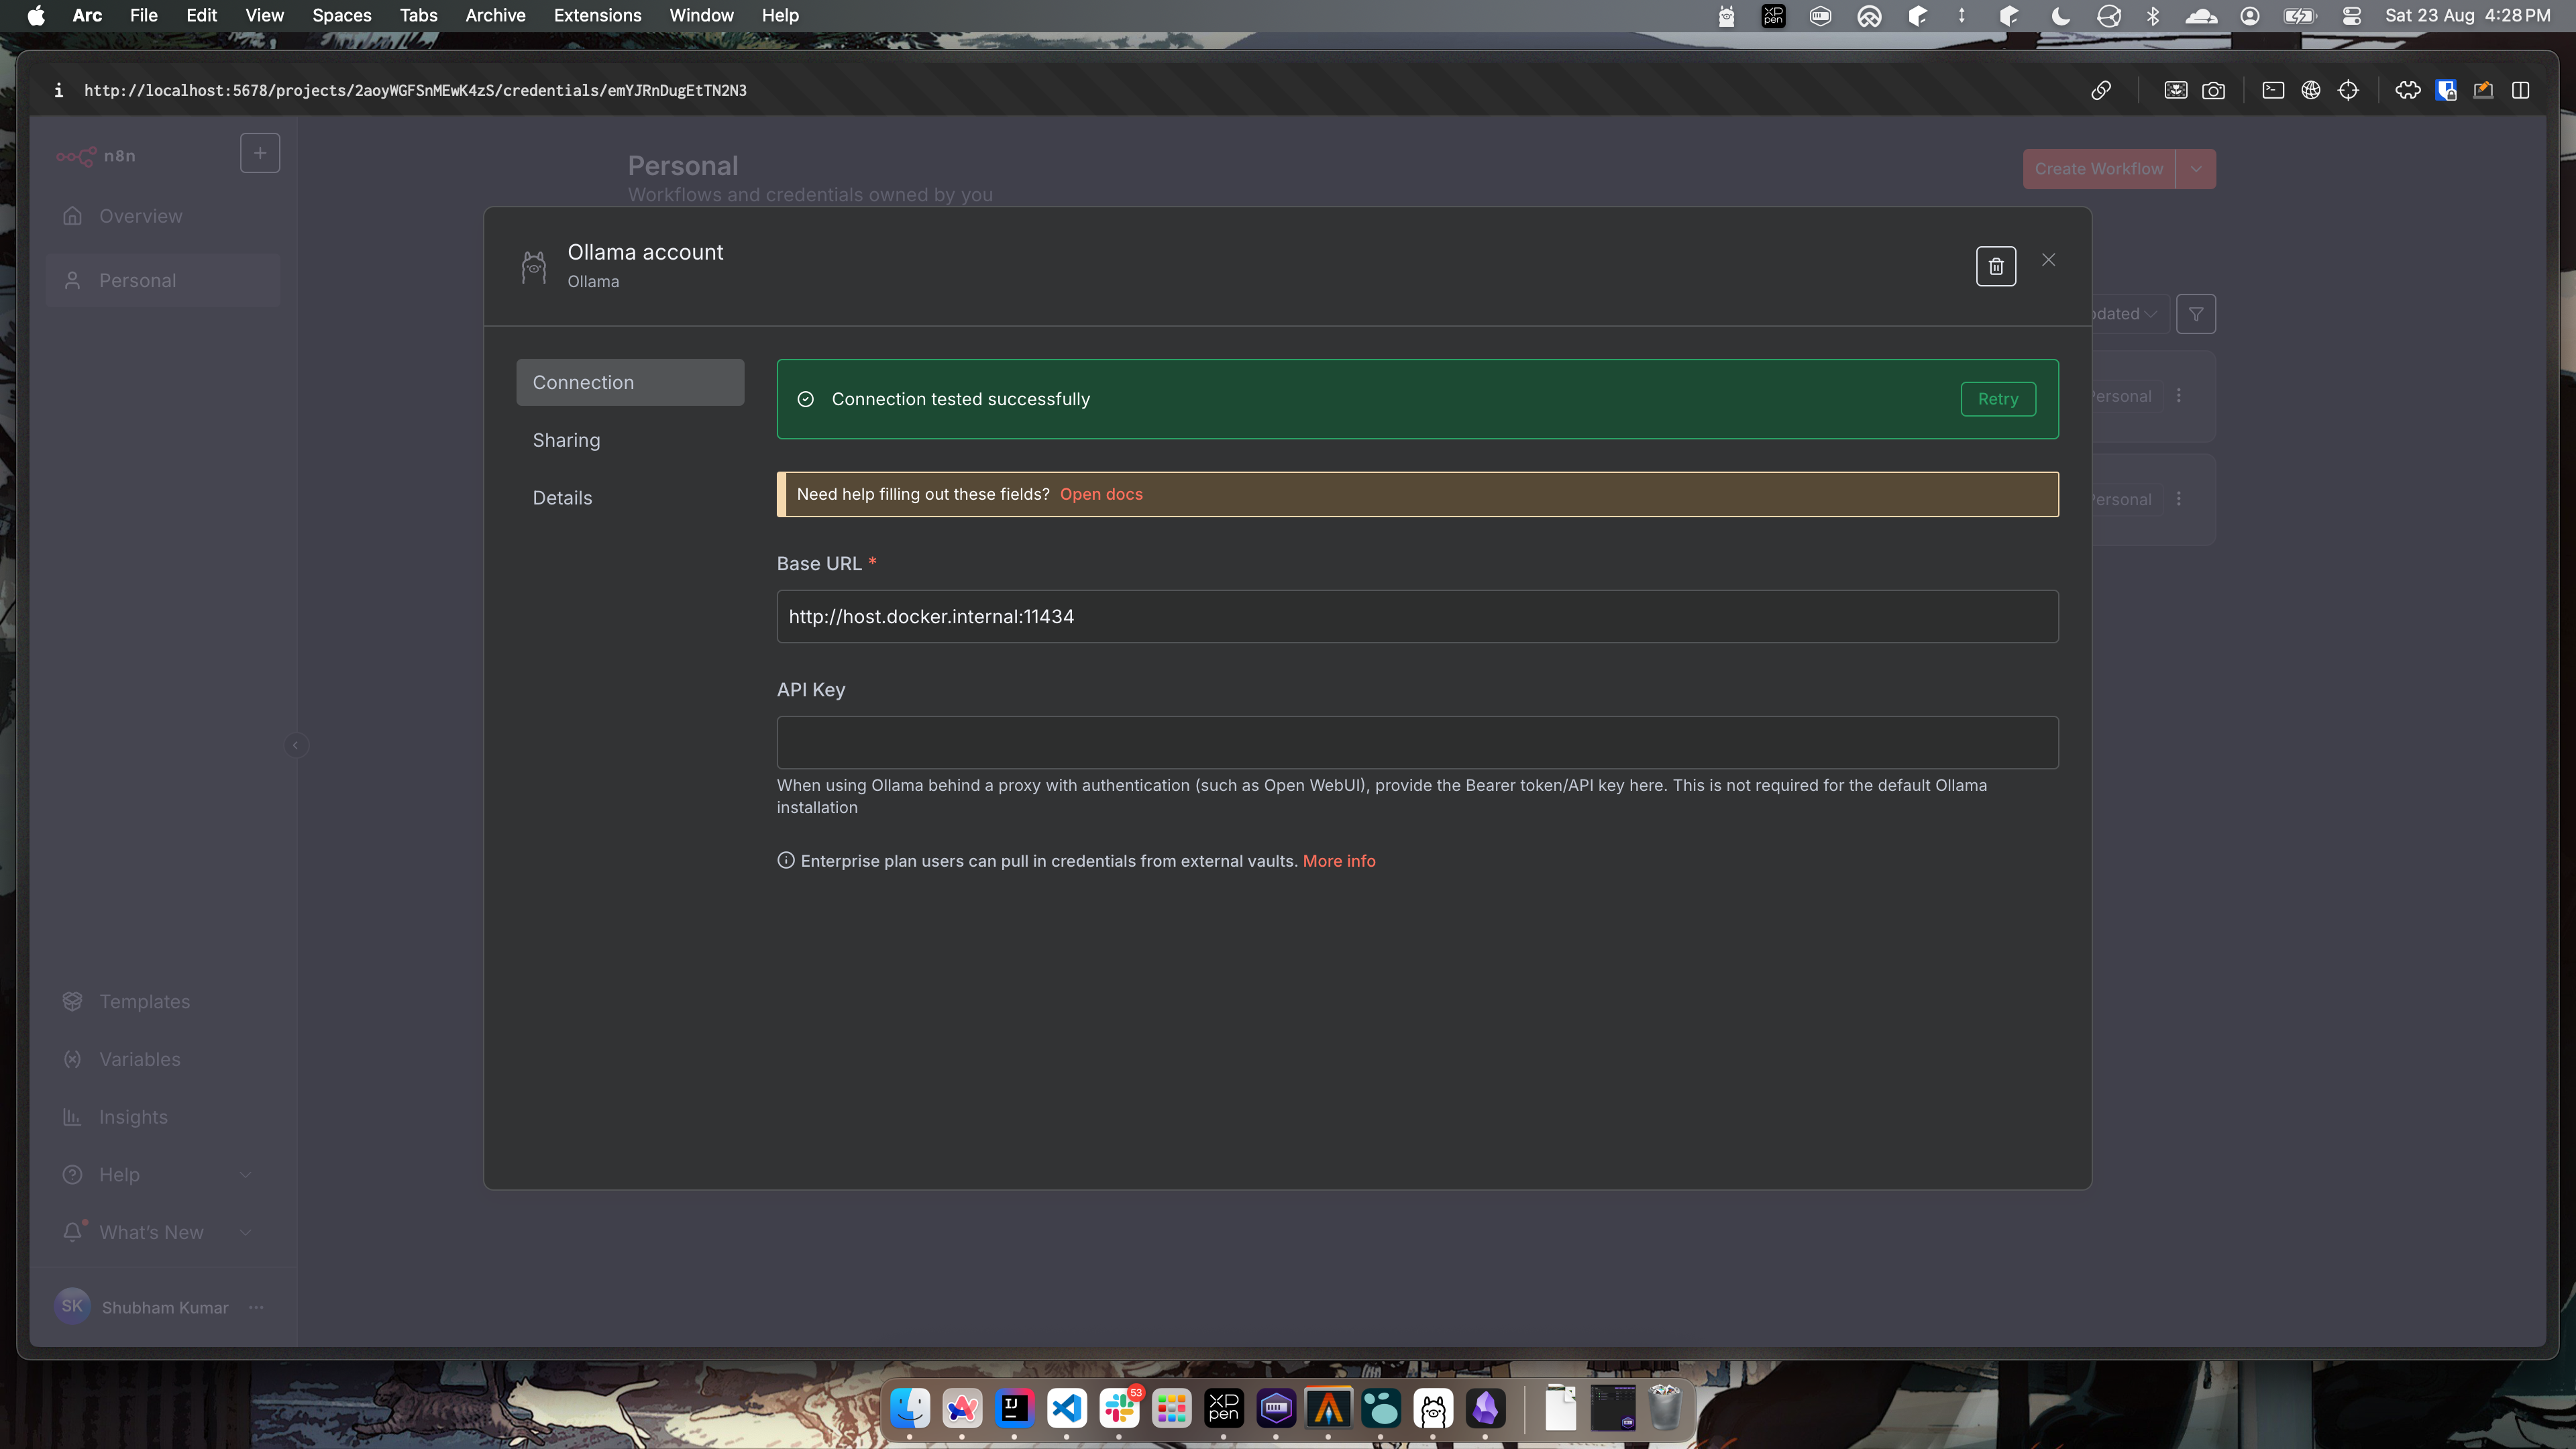
- You will need to add credentials to direct the Ollama instance.
To do this go to Personal -> Credentials and add the below credential.
As the n8n instance is hosted using docker, and ollama is serving on localhost, we need to enter the internal docker url which points to the root localhost -host.docker.internal
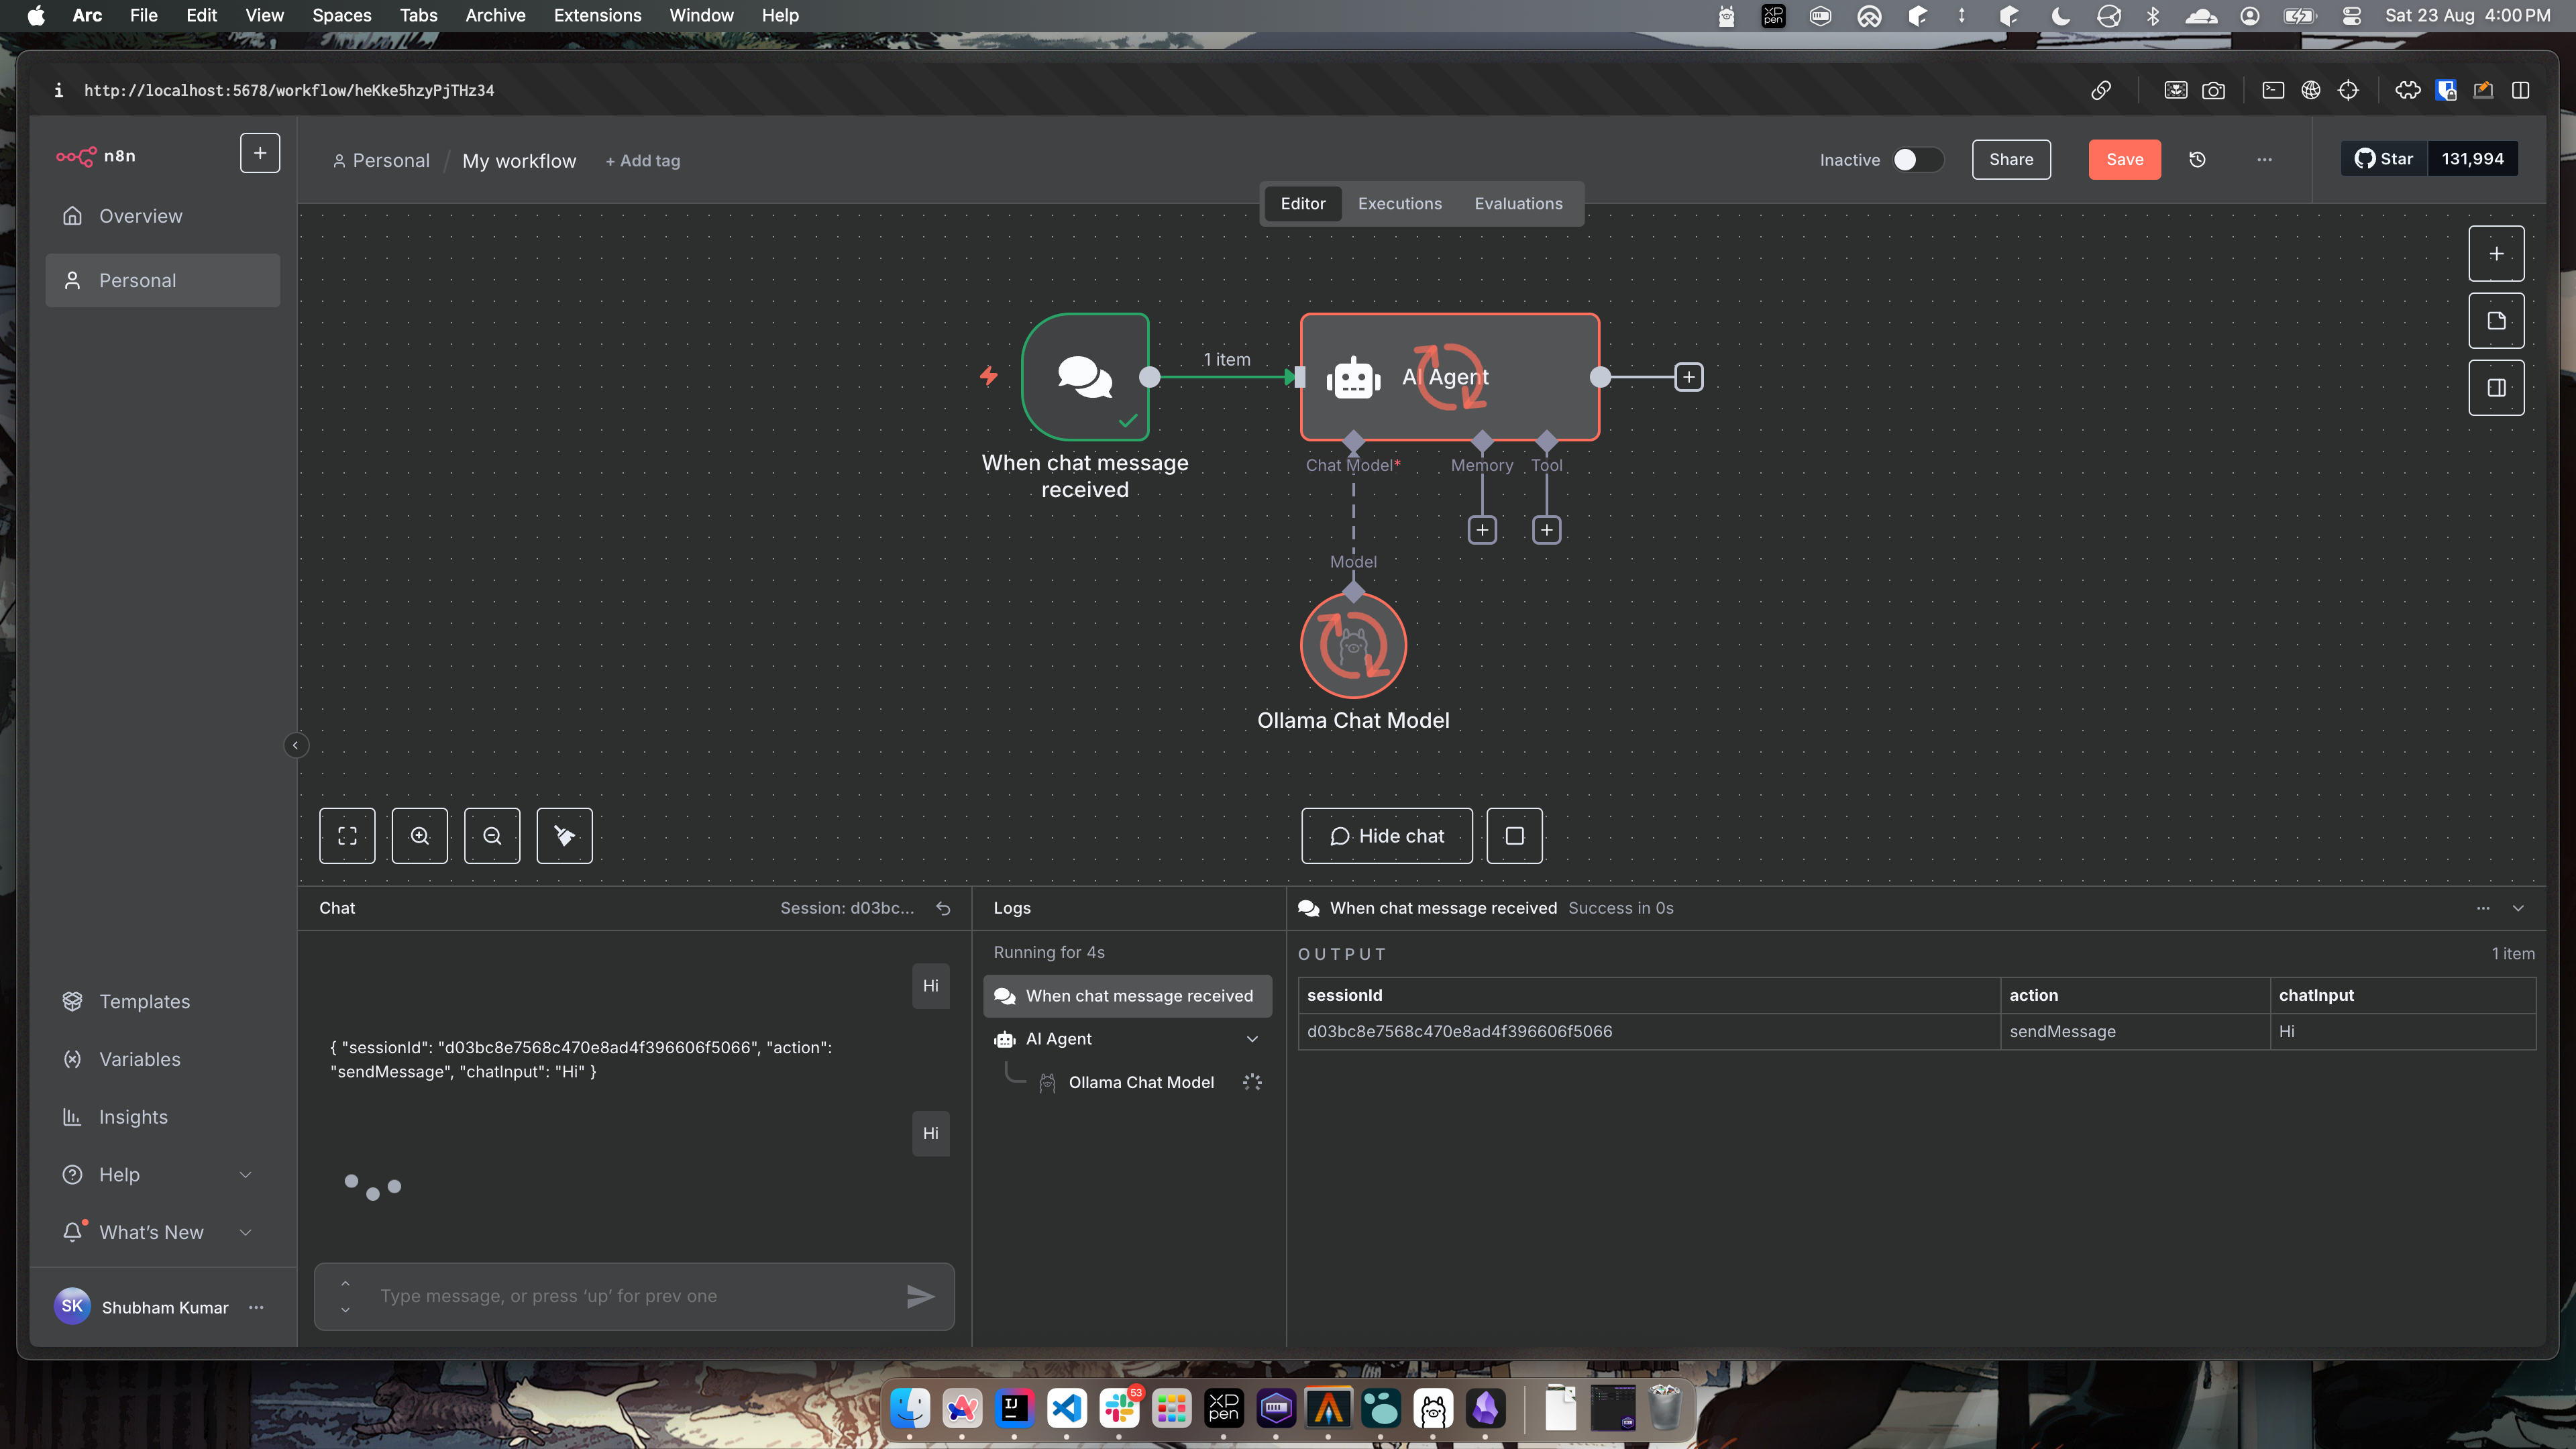
- Now you can run your workflow and it will connect to
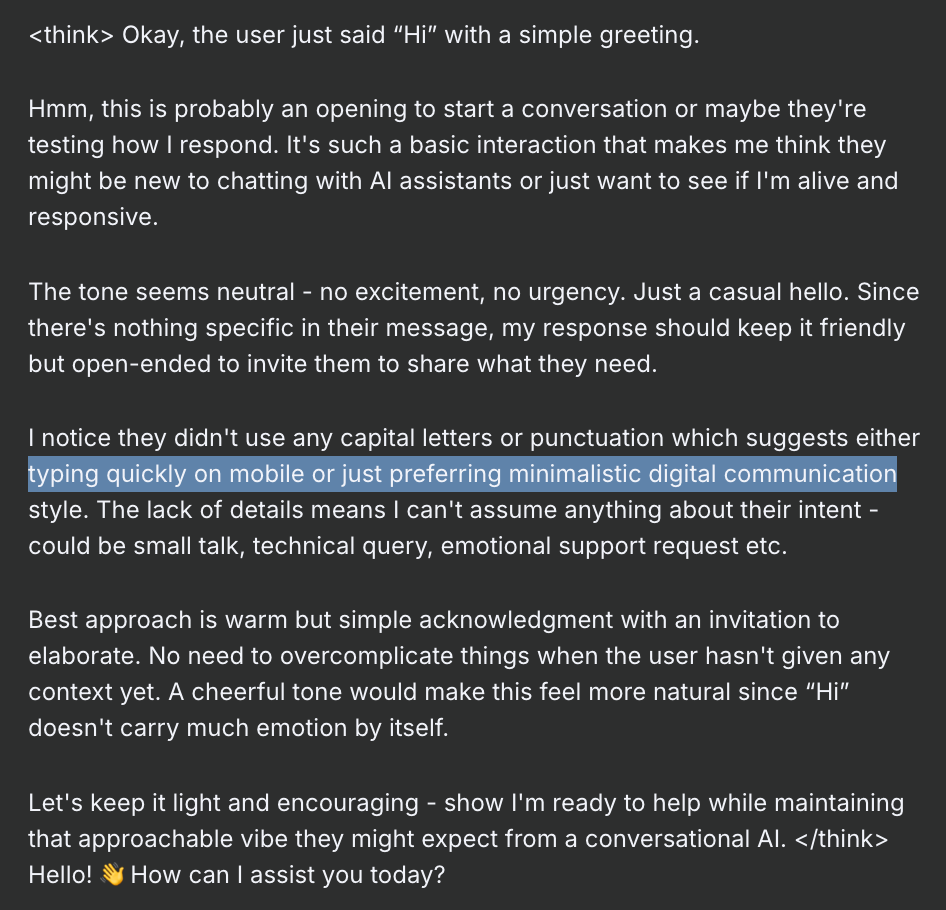
deepseekmodel and provide you responses. Simply sayHito the model and here is how it runs like.
- The response, contains both the thinking part which is between
<think></think>blocks and after this is the final output.
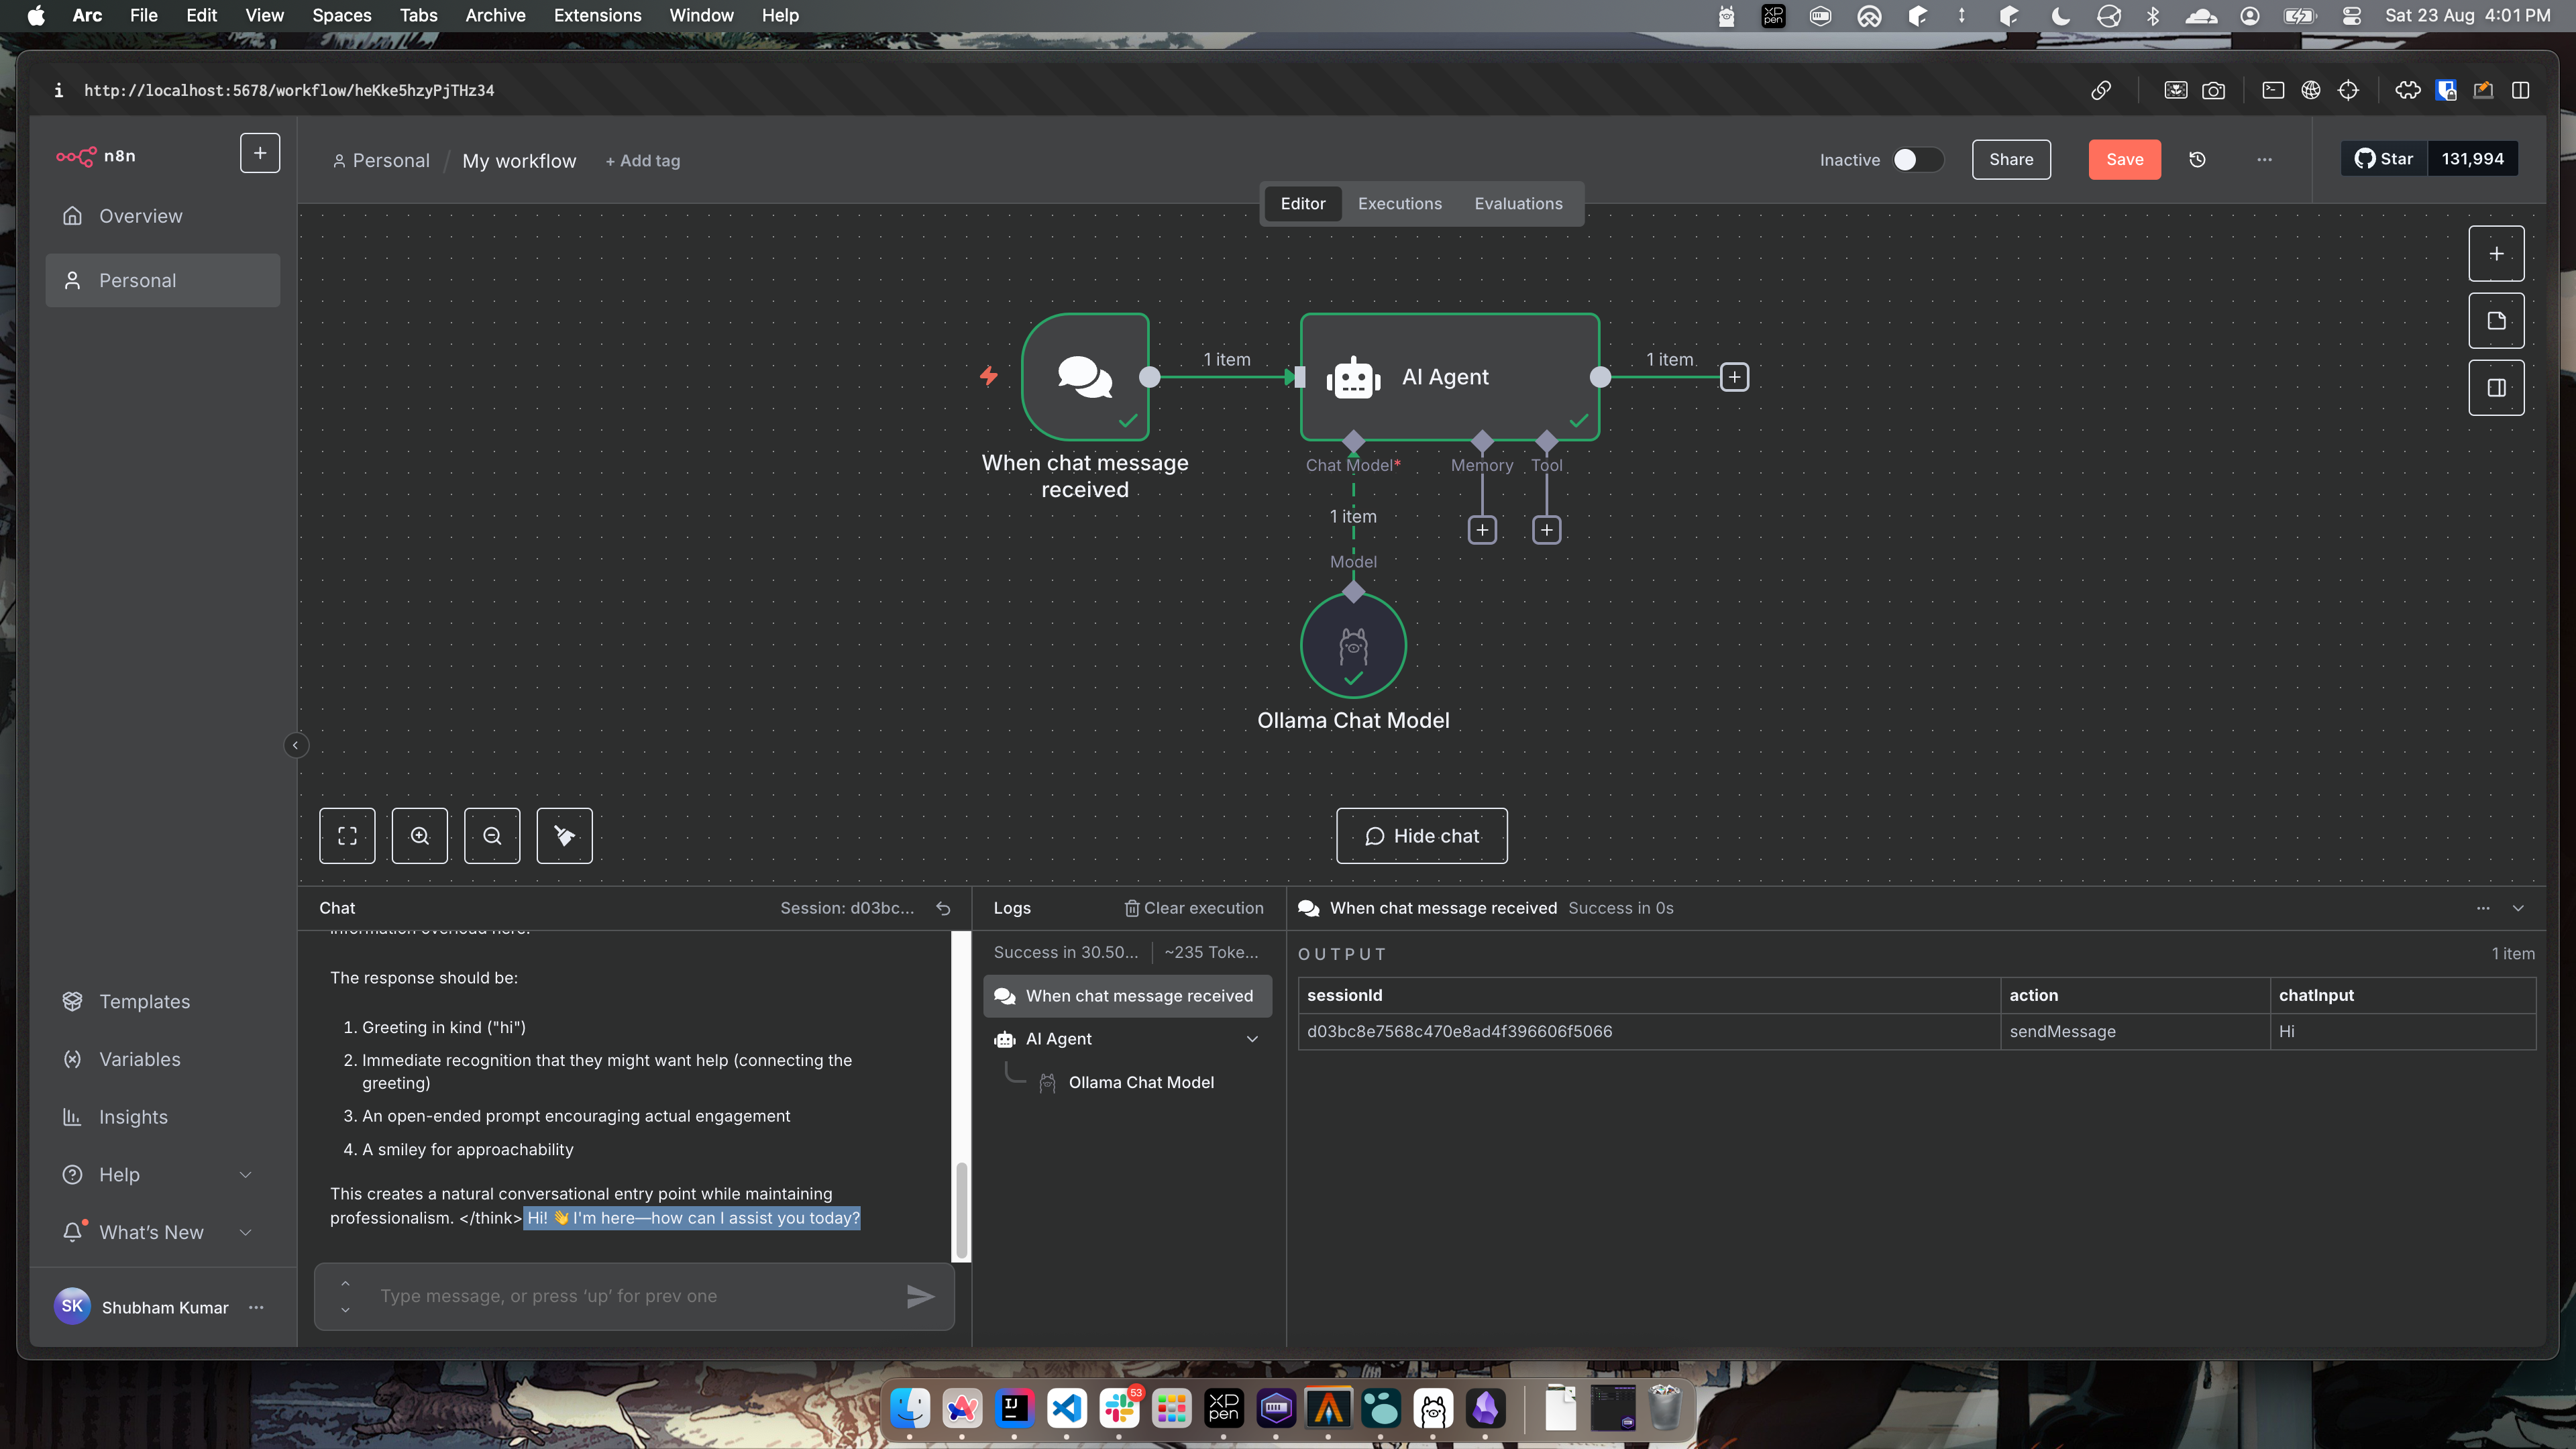
Why am I getting a feel that this model is overthinking and I am feeling a bit afraid. I just said 'Hi' and it thought so many things based on my 'Hi'.
Deepseek-r1 8b model is giving me Psychopath vibes
More things to explore
There are many tools that can be connected to this workflow. There is even a Grafana connection. Given we at GreyOrange, use Grafana as our main monitoring tool, I am flooded with experiments I can do with LLM.
Next I'm thinking of adding context to the model using config and debug logs and asking it to analyze those logs. Maybe we can store the entire codebase on a Vector DB (I saw Weaviate store connector) and connect that as a context to the model.
There are endless possibilities that I can think to automate.
Conclusion
In this post, we saw how to install n8n and connect it to deepseek model, all hosted locally.